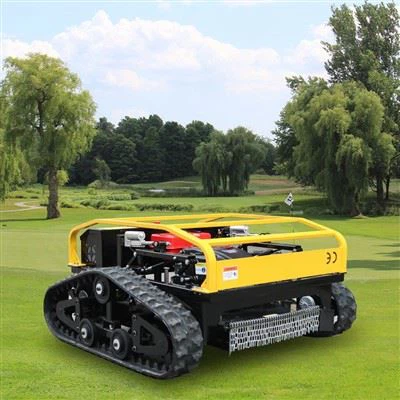
As a reputable supplier of remote mowers, I understand the importance of maintaining your equipment to ensure optimal performance. One crucial aspect of this maintenance is knowing how to replace the battery of your remote mower correctly. In this blog post, I'll guide you through the process step by step, sharing valuable insights and tips along the way.
Why Battery Replacement is Important
Before we dive into the replacement process, let's understand why it's essential to replace the battery when needed. Over time, batteries lose their capacity to hold a charge, which can lead to reduced mowing time and overall performance. A worn - out battery may also cause your mower to operate inefficiently, consuming more power and potentially causing damage to other components. By replacing the battery at the right time, you can keep your remote mower running smoothly and extend its lifespan.
Tools and Materials You'll Need
- Replacement Battery: Make sure to choose a battery that is compatible with your specific remote mower model. You can usually find this information in the mower's user manual or by contacting our customer support team.
- Screwdriver: Depending on your mower's design, you may need a Phillips or flat - head screwdriver to access the battery compartment.
- Safety Gloves: To protect your hands during the replacement process.
Step - by - Step Guide to Battery Replacement
Step 1: Safety First
Before you start working on your remote mower, ensure that it is turned off and disconnected from the remote control. This will prevent any accidental starts and protect you from potential injury. Put on your safety gloves to avoid any contact with battery acid or other harmful substances.
Step 2: Locate the Battery Compartment
The battery compartment is typically located on the underside or at the rear of the mower. Refer to your mower's user manual if you're having trouble finding it. Some mowers may have a removable cover secured with screws, while others may have a latch or a snap - on design.


Step 3: Remove the Old Battery
If your mower has a screw - secured cover, use the appropriate screwdriver to remove the screws and lift the cover off. For latch or snap - on designs, carefully release the mechanism to open the compartment. Once the compartment is open, locate the battery connectors. These are usually color - coded (red for positive and black for negative). Gently disconnect the connectors by pulling them apart. Be careful not to pull on the wires themselves, as this could cause damage. After disconnecting the connectors, lift the old battery out of the compartment and set it aside.
Step 4: Prepare the New Battery
Take your new battery and make sure it is fully charged. Check the connectors on the new battery to ensure they match the ones on your mower. If necessary, clean the connectors with a dry cloth to remove any dirt or debris.
Step 5: Install the New Battery
Place the new battery into the compartment, making sure it fits snugly. Connect the battery connectors to the corresponding terminals on the mower. Start with the positive (red) connector and then connect the negative (black) one. Ensure that the connections are secure and there is no loose wiring.
Step 6: Close the Battery Compartment
If you removed a cover, carefully place it back over the battery compartment and secure it with the screws or re - engage the latch or snap - on mechanism. Make sure the cover is properly sealed to prevent any dirt, water, or debris from entering the compartment.
Step 7: Test the Mower
Once the battery is installed and the compartment is closed, turn on your remote mower using the remote control. Check if the mower starts up smoothly and if all the functions are working correctly. If you encounter any issues, double - check the battery connections and refer to your mower's troubleshooting guide.
Tips for Battery Maintenance
- Regular Charging: Charge your battery after each use to keep it in good condition. Avoid over - charging, as this can reduce the battery's lifespan.
- Proper Storage: If you're not going to use your mower for an extended period, store the battery in a cool, dry place. Remove the battery from the mower to prevent self - discharge.
- Inspect the Battery: Periodically check the battery for signs of damage, such as cracks or leaks. If you notice any issues, replace the battery immediately.
Related Products
If you're in the market for a new remote mower or looking to upgrade your current one, we offer a range of high - quality products. Check out our Remote Control Lawn Mower With Tracks, which provides excellent traction and maneuverability on various terrains. Our Remote Control Grass Cutter is another great option for efficient grass cutting. And for those who need a reliable tracked mower, our Remote Control Lawn Mower With Tracks is a top - choice.
Contact Us for Procurement
If you have any questions about battery replacement, our remote mowers, or are interested in placing an order, we're here to help. Contact our sales team, and we'll be happy to discuss your requirements and provide you with the best solutions for your lawn care needs.
References
- Manufacturer's user manuals for remote mowers.
- Industry best practices for battery maintenance and replacement.