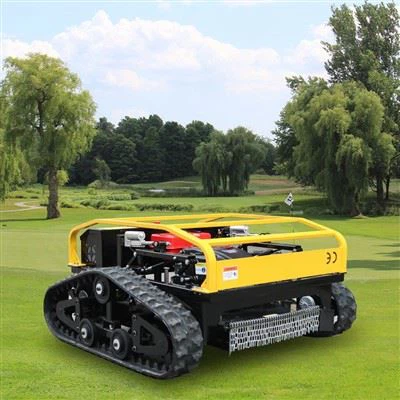
As a supplier of Remote Mowers, I often receive inquiries from customers about various maintenance aspects of these machines. One common question is how to check the oil level in a remote mower, especially if it uses oil. In this blog post, I'll walk you through the step - by - step process of checking the oil level in a remote mower, ensuring that your equipment runs smoothly and efficiently.
Why Checking Oil Level is Important
Before we dive into the actual process, it's crucial to understand why checking the oil level in your remote mower is so important. Oil serves multiple vital functions in the engine of a remote mower. It lubricates the moving parts, reducing friction and wear, which in turn extends the lifespan of the engine. Additionally, oil helps to cool the engine by carrying away heat generated during operation. A proper oil level also ensures that the engine operates at its optimal performance, providing sufficient power for mowing and preventing potential breakdowns.
Pre - check Preparations
- Safety First: Before you start checking the oil level, make sure the remote mower is turned off and has cooled down. The engine can get extremely hot during operation, and attempting to check the oil while it's still hot can lead to burns. Also, ensure that the mower is on a level surface. This is essential because an uneven surface can give you an inaccurate reading of the oil level.
- Gather Necessary Tools: You'll need a clean rag or paper towel to wipe the dipstick before and after checking the oil. Some remote mowers may also require a specific tool to access the dipstick or oil filler cap, so check your mower's manual to see if any special tools are needed.
Locating the Oil Dipstick or Oil Filler Cap
The first step in checking the oil level is to find the oil dipstick or oil filler cap. In most remote mowers, the dipstick or oil filler cap is located on the engine. The location can vary depending on the make and model of the mower. You can refer to your mower's user manual to find the exact location. In some cases, the dipstick will have a bright - colored handle, usually yellow or red, to make it easier to spot.
Checking the Oil Level
- Remove and Wipe the Dipstick: Once you've located the dipstick, pull it out of the engine. Use the clean rag or paper towel to wipe off any oil that's on the dipstick. This ensures that you get an accurate reading of the current oil level.
- Re - insert the Dipstick: After wiping the dipstick clean, carefully re - insert it all the way back into the dipstick tube. Make sure it's fully seated to get an accurate measurement.
- Remove and Read the Dipstick Again: Pull the dipstick out once more. Look at the end of the dipstick where the oil has coated it. Most dipsticks have markings indicating the minimum and maximum oil levels. If the oil level is between these two markings, the oil level is adequate. If the oil level is below the minimum mark, you'll need to add oil. If it's above the maximum mark, you may need to drain some oil.
Adding or Draining Oil
- Adding Oil: If the oil level is below the minimum mark, you'll need to add oil. First, choose the right type of oil for your remote mower. Refer to your mower's manual for the recommended oil viscosity and grade. Remove the oil filler cap, which is usually near the dipstick. Slowly pour the oil into the filler opening. It's a good idea to add the oil in small increments and then check the oil level again using the dipstick. This helps prevent over - filling.
- Draining Oil: If the oil level is above the maximum mark, you'll need to drain some oil. This process is a bit more involved and usually requires a drain plug. Place a suitable container under the drain plug to catch the oil. Remove the drain plug and let the excess oil drain out. Once the oil level is within the proper range, replace the drain plug tightly.
Frequency of Oil Checks
It's a good practice to check the oil level in your remote mower before each use or at least once a week if you use the mower regularly. Regular oil checks can help you catch any potential issues early, such as oil leaks or excessive oil consumption.
Maintenance Tips for Long - Term Performance
- Regular Oil Changes: In addition to checking the oil level, regular oil changes are essential for the long - term performance of your remote mower. Over time, oil breaks down and becomes less effective at lubricating and cooling the engine. Refer to your mower's manual for the recommended oil change interval.
- Inspect for Oil Leaks: While checking the oil level, take a moment to inspect the engine and surrounding areas for any signs of oil leaks. Look for puddles of oil under the mower or oil stains on the engine components. If you notice an oil leak, it's important to address it promptly to prevent further damage.
Conclusion
Checking the oil level in a remote mower is a simple yet crucial maintenance task that can significantly impact the performance and lifespan of your equipment. By following these steps and performing regular oil checks, you can ensure that your remote mower runs smoothly and efficiently.


If you're in the market for a high - quality Remote Control Mower or Remote Control Mower that's easy to maintain, we're here to help. Our Remote Mower models are designed with durability and performance in mind. If you have any questions about our products or need further assistance with maintenance, don't hesitate to contact us for procurement and negotiation. We're committed to providing you with the best solutions for your lawn - mowing needs.
References
- Owner's Manuals of Various Remote Mowers
- Industry Standards for Small Engine Maintenance