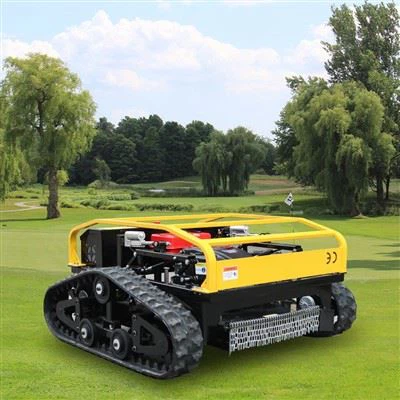
Installing the boundary wire for a remote mower is a crucial step in ensuring that your lawn is mowed efficiently and safely. As a supplier of high-quality remote mowers, I understand the importance of getting this installation right. In this blog post, I'll guide you through the process of installing the boundary wire for a remote mower, sharing some tips and best practices along the way.
Understanding the Purpose of the Boundary Wire
Before we dive into the installation process, it's important to understand why the boundary wire is so essential. The boundary wire acts as an invisible fence for your remote mower. It defines the area where the mower is allowed to operate, preventing it from wandering into areas you don't want it to reach, such as flower beds, driveways, or neighboring properties. By setting up the boundary wire correctly, you can ensure that your mower stays within the designated mowing area, providing a neat and uniform cut to your lawn.
Gathering the Necessary Tools and Materials
To install the boundary wire for your remote mower, you'll need the following tools and materials:
- Boundary Wire: This is the main component that will create the boundary for your mower. Make sure to choose a high-quality wire that is suitable for outdoor use and can withstand the elements.
- Wire Connectors: These are used to join sections of the boundary wire together. They ensure a secure connection and prevent the wire from coming loose.
- Stakes: You'll need stakes to secure the boundary wire to the ground. Choose stakes that are strong enough to hold the wire in place, even in windy conditions.
- Wire Tensioner: A wire tensioner helps to keep the boundary wire taut, ensuring that it remains visible to the mower's sensors.
- Shovel or Trencher: Depending on your preference and the type of soil in your lawn, you may need a shovel or trencher to bury the boundary wire. Burying the wire can help protect it from damage and make it less visible.
- Measuring Tape: A measuring tape is essential for accurately measuring the length of the boundary wire and marking the installation points.
Planning the Boundary Layout
Before you start installing the boundary wire, it's important to plan the layout of your mowing area. Take a walk around your lawn and identify the areas you want the mower to cover. Consider any obstacles, such as trees, shrubs, or flower beds, that you want to exclude from the mowing area. Use a measuring tape to measure the perimeter of the mowing area and mark the corners with stakes.
Once you have marked the corners, you can start laying out the boundary wire. Use a series of straight lines and curves to define the shape of the mowing area. Make sure to leave enough space between the boundary wire and any obstacles to prevent the mower from getting stuck.
Installing the Boundary Wire
Now that you have planned the boundary layout, it's time to start installing the boundary wire. Here's a step-by-step guide to help you through the process:
- Prepare the Ground: If you're planning to bury the boundary wire, use a shovel or trencher to dig a shallow trench around the perimeter of the mowing area. The trench should be about 2-3 inches deep and wide enough to accommodate the wire.
- Lay the Boundary Wire: Start at one corner of the mowing area and lay the boundary wire along the trench. Use wire connectors to join sections of the wire together as needed. Make sure to leave a small loop at each end of the wire for connection to the mower's control unit.
- Secure the Wire with Stakes: As you lay the boundary wire, use stakes to secure it to the ground at regular intervals. Make sure the stakes are driven firmly into the soil to prevent the wire from shifting.
- Tension the Wire: Once the boundary wire is laid and secured, use a wire tensioner to tighten the wire. This will help ensure that the wire remains taut and visible to the mower's sensors.
- Connect the Wire to the Control Unit: After the boundary wire is installed and tensioned, connect the ends of the wire to the mower's control unit. Follow the manufacturer's instructions carefully to ensure a proper connection.
- Test the System: Before you let the mower loose on your lawn, it's important to test the boundary wire system to make sure it's working properly. Turn on the mower and let it run along the boundary wire. If the mower stops when it reaches the wire, the system is working correctly. If not, check the connections and make any necessary adjustments.
Tips and Best Practices
- Use High-Quality Materials: Investing in high-quality boundary wire, connectors, and stakes will ensure a reliable and long-lasting installation.
- Avoid Sharp Bends and Kinks: When laying the boundary wire, try to avoid sharp bends and kinks. These can cause the wire to break or interfere with the mower's sensors.
- Keep the Wire Away from Other Electrical Wires: Make sure to keep the boundary wire at least 12 inches away from other electrical wires, such as power lines or underground cables. This will prevent interference and ensure the safety of your mower and your home.
- Regularly Inspect the Boundary Wire: Over time, the boundary wire may become damaged or displaced. Regularly inspect the wire for any signs of wear or damage and make any necessary repairs or adjustments.
- Follow the Manufacturer's Instructions: Always follow the manufacturer's instructions when installing and using your remote mower and boundary wire system. This will ensure that you get the best performance and avoid any potential safety hazards.
Conclusion
Installing the boundary wire for a remote mower is a relatively straightforward process that can be completed in a few hours with the right tools and materials. By following the steps outlined in this blog post and using the tips and best practices, you can ensure a successful installation and enjoy a beautifully mowed lawn.
If you're in the market for a high-quality remote mower, we offer a wide range of options to suit your needs. Check out our Remote Control Lawn Mower With Tracks, Remote Control Mower, and Remote Control Grass Cutter for more information.


If you have any questions or need further assistance with installing the boundary wire for your remote mower, please don't hesitate to contact us. We're here to help you make the most of your remote mower and keep your lawn looking its best.
References
- Manufacturer's instructions for your remote mower and boundary wire system.
- Online resources and forums for remote mower users.