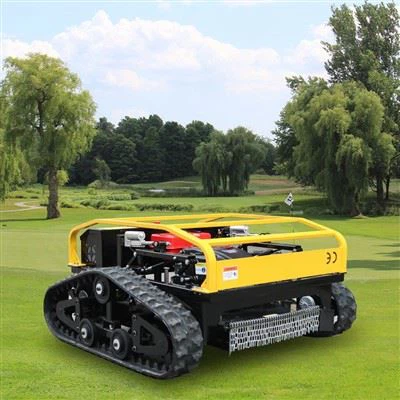
As a supplier of Remote Mowers, I'm often asked about the installation process of the remote control system for these innovative machines. In this blog post, I'll walk you through the steps to install the remote control system of a remote mower, providing you with a detailed guide that ensures a smooth and successful setup.
Step 1: Gather the Necessary Tools and Equipment
Before you begin the installation process, it's essential to gather all the tools and equipment you'll need. Here's a list of items you should have on hand:
- Remote control system kit (including the transmitter and receiver)
- Screwdrivers (both flathead and Phillips)
- Wrenches
- Electrical tape
- Wire cutters/strippers
- Mounting brackets and hardware
Make sure you have all the components included in the remote control system kit and that they are in good condition. If any parts are missing or damaged, contact your supplier for replacements.
Step 2: Prepare the Mower
The first step in installing the remote control system is to prepare the mower. Start by turning off the mower and disconnecting the battery to prevent any electrical accidents. Then, clean the area where you'll be installing the receiver to ensure a secure and stable mount.
Next, identify the power source on the mower. This is typically the battery or the electrical system. You'll need to connect the receiver to the power source to provide it with the necessary energy to operate. Refer to the manufacturer's instructions for the specific wiring requirements of your remote control system.
Step 3: Install the Receiver
Once you've prepared the mower, it's time to install the receiver. Locate a suitable mounting location for the receiver on the mower. This should be a secure and protected area that is away from moving parts and excessive heat. Use the mounting brackets and hardware provided in the kit to attach the receiver to the mower.
After mounting the receiver, connect the wiring according to the manufacturer's instructions. This may involve connecting power wires, signal wires, and ground wires. Make sure all connections are tight and secure to prevent any loose connections that could cause the system to malfunction.
Step 4: Install the Transmitter
The transmitter is the handheld device that you'll use to control the mower remotely. To install the transmitter, start by inserting the batteries according to the manufacturer's instructions. Make sure the batteries are properly inserted and that the transmitter is turned off.


Next, pair the transmitter with the receiver. This process may vary depending on the specific remote control system you're using. Refer to the manufacturer's instructions for the exact pairing procedure. Typically, you'll need to press a button on the transmitter and a corresponding button on the receiver to establish a connection.
Step 5: Test the System
Once you've installed the receiver and transmitter and paired them together, it's time to test the system. Turn on the mower and the transmitter and check if the remote control system is working properly. Use the transmitter to control the mower's functions, such as starting, stopping, and changing directions.
If the system is not working correctly, double-check all the connections and make sure the batteries are properly inserted. Refer to the manufacturer's troubleshooting guide for further assistance. If you're still experiencing issues, contact your supplier for technical support.
Step 6: Secure the Wiring
After testing the system and ensuring that it's working properly, it's important to secure the wiring to prevent any damage or interference. Use electrical tape or cable ties to secure the wires and keep them organized. Make sure the wiring is away from moving parts and that it doesn't interfere with the mower's operation.
Step 7: Final Checks
Before you start using the remote mower, perform a final check to ensure everything is in order. Check all the connections again to make sure they are tight and secure. Inspect the mounting brackets and hardware to ensure the receiver is firmly attached to the mower.
Also, test the remote control system one more time to make sure it's working correctly. If everything looks good, you're ready to start using your remote mower with the newly installed remote control system.
Conclusion
Installing the remote control system of a remote mower may seem like a complex task, but by following these steps and referring to the manufacturer's instructions, you can successfully complete the installation process. As a Remote Mower supplier, we're committed to providing you with high-quality products and comprehensive support to ensure your satisfaction.
If you're interested in purchasing a Remote Control Grass Cutter, Remote Control Flail Mower, or Remote Control Mower, or if you have any questions about the installation process or our products, please don't hesitate to contact us. We're here to help you find the right solution for your lawn care needs.
References
- Manufacturer's instructions for the remote control system
- User manual for the remote mower