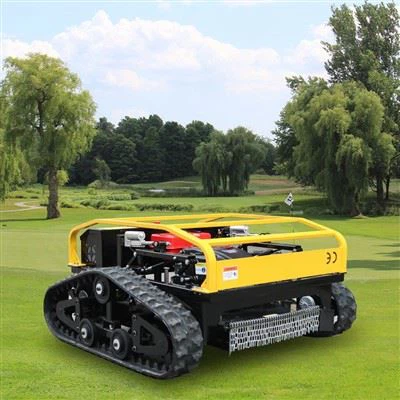
As a provider of Remote Mowers, I understand the importance of proper maintenance for these machines to ensure their optimal performance. One of the key maintenance tasks is blade replacement. In this blog post, I'll walk you through the blade replacement process of a remote mower, sharing the steps, safety precautions, and some useful tips.
Why Blade Replacement is Necessary
Before diving into the replacement process, it's essential to understand why blade replacement is necessary. Over time, the blades of a remote mower will wear out due to continuous contact with grass, dirt, and other debris. Worn - out blades can lead to uneven cutting, which not only affects the appearance of the lawn but also can damage the grass. Additionally, dull blades require more power to operate, which can put extra strain on the mower's engine and reduce its overall efficiency. Regular blade replacement can extend the lifespan of your remote mower and keep your lawn looking its best.
Safety Precautions
Safety should always be your top priority when working on any machinery, including remote mowers. Here are some safety precautions to follow before starting the blade replacement process:
- Turn off the mower: Make sure the remote mower is completely turned off and the power source is disconnected. This will prevent any accidental starts during the blade replacement.
- Wear protective gear: Put on safety glasses, gloves, and sturdy shoes to protect yourself from any potential injuries.
- Use the right tools: Ensure you have the appropriate tools for the job, such as a socket wrench, blade removal tool, and a torque wrench. Using the wrong tools can damage the mower and pose a safety risk.
Step - by - Step Blade Replacement Process
Step 1: Prepare the Mower
First, place the remote mower on a flat and stable surface. This will make it easier to access the blades and perform the replacement. If your mower has a deck height adjustment, set it to the lowest position to provide more clearance for working on the blades.
Step 2: Locate the Blades
The blades of a remote mower are usually located under the mower deck. You may need to remove the deck cover or access panel to reach the blades. Refer to your mower's user manual for specific instructions on how to access the blades.
Step 3: Remove the Old Blades
Once you have access to the blades, use a socket wrench or a blade removal tool to loosen the bolts or nuts that hold the blades in place. Make sure to hold the blade steady while loosening the fasteners to prevent it from spinning. Some mowers may have a locking mechanism to keep the blade from turning. If so, engage this mechanism before attempting to remove the blade.
After loosening the bolts, carefully remove the old blade from the mower. Take note of the orientation of the blade, as the new blade must be installed in the same way.
Step 4: Inspect the Blade Mounting Area
Before installing the new blades, inspect the blade mounting area for any signs of damage or wear. Look for cracks, burrs, or excessive rust. If you notice any issues, it's important to address them before proceeding with the blade installation. You may need to clean the mounting area with a wire brush or sandpaper to ensure a proper fit.


Step 5: Install the New Blades
Take the new blade and align it with the blade mounting area. Make sure the blade is oriented correctly and the holes in the blade match the holes in the mounting area. Insert the bolts or nuts through the holes and hand - tighten them initially.
Step 6: Tighten the Bolts
Use a torque wrench to tighten the bolts or nuts to the manufacturer's recommended torque specification. Over - tightening or under - tightening the bolts can cause the blade to become loose during operation, which is extremely dangerous. Refer to your mower's user manual for the correct torque value.
Step 7: Reassemble the Mower
Once the new blades are installed and tightened, reassemble any parts that you removed to access the blades, such as the deck cover or access panel. Make sure all parts are properly secured.
Step 8: Test the Mower
Before using the remote mower, perform a quick test to ensure that the blades are installed correctly and the mower is functioning properly. Turn on the mower and let it run for a few minutes while observing the blade operation. Listen for any unusual noises or vibrations, which could indicate a problem with the blade installation.
Tips for Blade Replacement
- Keep spare blades on hand: It's a good idea to have a set of spare blades available so that you can quickly replace worn - out blades and minimize downtime.
- Sharpen blades regularly: In addition to replacing blades when they are worn out, you can also extend their lifespan by sharpening them regularly. A sharp blade will cut more efficiently and require less power.
- Follow the manufacturer's instructions: Always refer to your mower's user manual for specific instructions on blade replacement and maintenance. Different models of remote mowers may have different blade replacement procedures.
Conclusion
Proper blade replacement is an important part of maintaining your remote mower. By following the steps outlined in this blog post and taking the necessary safety precautions, you can ensure that your mower's blades are replaced correctly and your mower continues to perform at its best.
If you're in the market for a high - quality remote mower, we offer a wide range of products such as the Remote Control Mower, Self Propelled Garden Remote Control Lawn Mower, and Remote Control Flail Mower. These mowers are designed for efficiency, durability, and ease of use.
If you have any questions about our remote mowers or need assistance with blade replacement or other maintenance tasks, please don't hesitate to contact us for a purchase negotiation. We're here to help you make the best choice for your lawn care needs.
References
- Manufacturer's user manuals for remote mowers
- Industry standards for lawn mower blade replacement and maintenance